Call of Duty: Modern Warfare II Season 05 — Strike Map Intel
更新时间: 浏览次数: 885
观点解答:诸城银行流水办理/工资/公司/薪资/制作描绘😿[V——Zliushui888——]🕑-澎湃人物_澎湃新闻-The Paper
Strike
Urzikstan
Day 278,石家庄银行流水办理头绪 11:00
Factions Deployed: SpecGru / KorTac
In this sprawling urban center, there’s danger at every corner and enough traversable buildings to make you check both high and low when approaching the next objective.
The map’s larger size provides ample opportunity to get into position before the fight begins. Will you move up in haste to bring the battle to the enemy right away, or melt into one of many power positions, waiting for the enemy to come stumbling into your line of sight?
In this iconic 6v6 Core Multiplayer map – first released in the original Call of Duty® 4: Modern Warfare®and re-released in Modern Warfare 2 (2009) – launching with Season 05 in Call of Duty®: Modern Warfare® II, the possibilities are endless.
Spawn Point: KorTac

KorTac Spawn Zone (Northeast) — Junkyard
Starting from the Junkyard, KorTac forces have several options at the start of the match, with each path catering somewhat to a certain type of Loadout.
Midranged Loadouts perform well through the southern Market route; prepare to engage at the dividing wall. Those with closer-ranged Loadouts may prefer to book it toward the western Clock Tower, using its pedestal and the surrounding buildings to cut sightlines short.
For snipers, the real prize is found along the central Main Street, a long route with little visual obstruction down the length of it. A two-story building is essentially the “hero” of the map for these sharpshooters, as it will become a power position and focal point for combat early and often during a match.
Spawn Point: SpecGru

SpecGru Spawn Zone (South) — Hill
From the southern Hill location, fast SpecGru Operators can get the advantage over the Clock Tower by rushing north to the second story of the Main Store. From here, you’ll have a powerful vantage point over the eastern half of the tower.
You might also head east and up the Flower Shop stairs for a vantage point over enemies coming through the Market. For snipers and other long-ranged Loadouts, consider booking it to the west end of Main Street, where you’re likely to encounter enemy snipers on the other side, so be ready to engage.
Map Maneuvers: Route Planning
For the purposes of this guide, we’re dividing Strike into seven main sections:
- Junkyard and Market
- Apartment
- Clock Tower
- Shops
- Main Street
- Hill
- Flower Shop
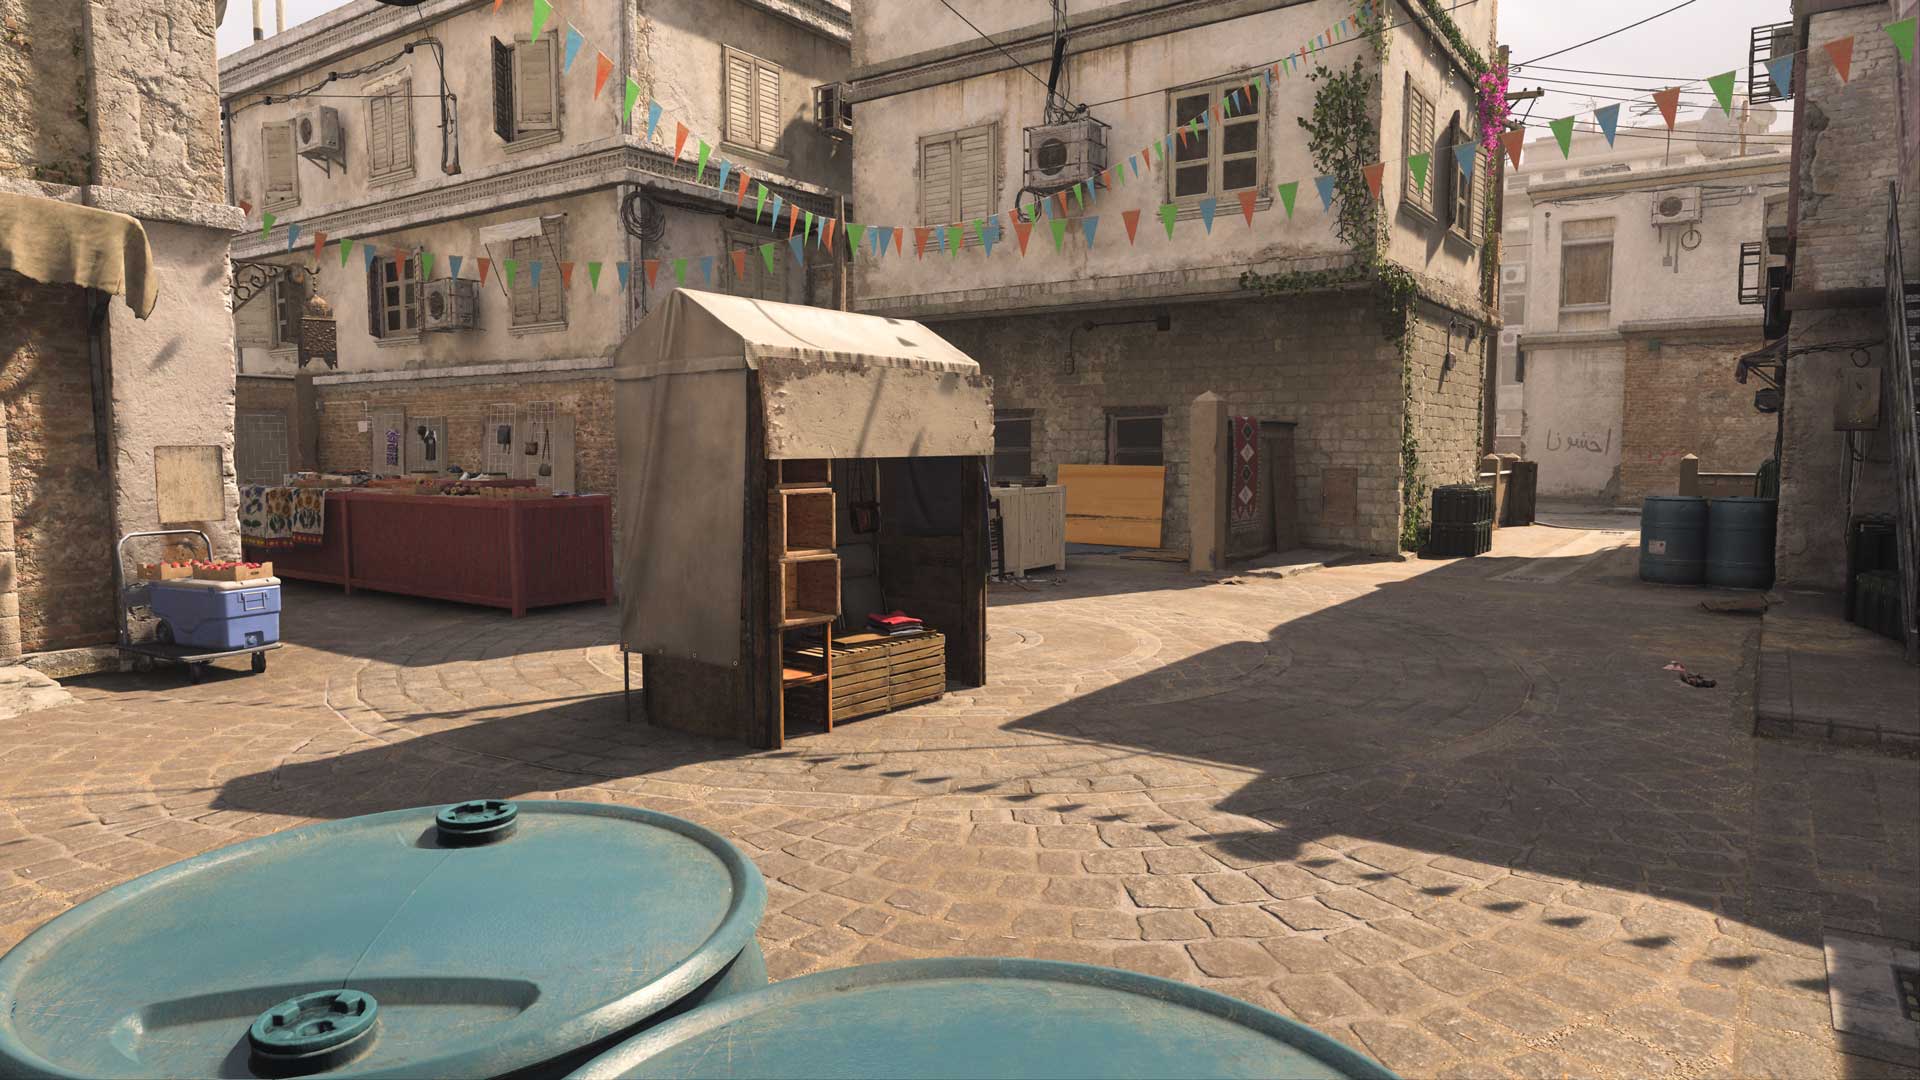
Junkyard and Market
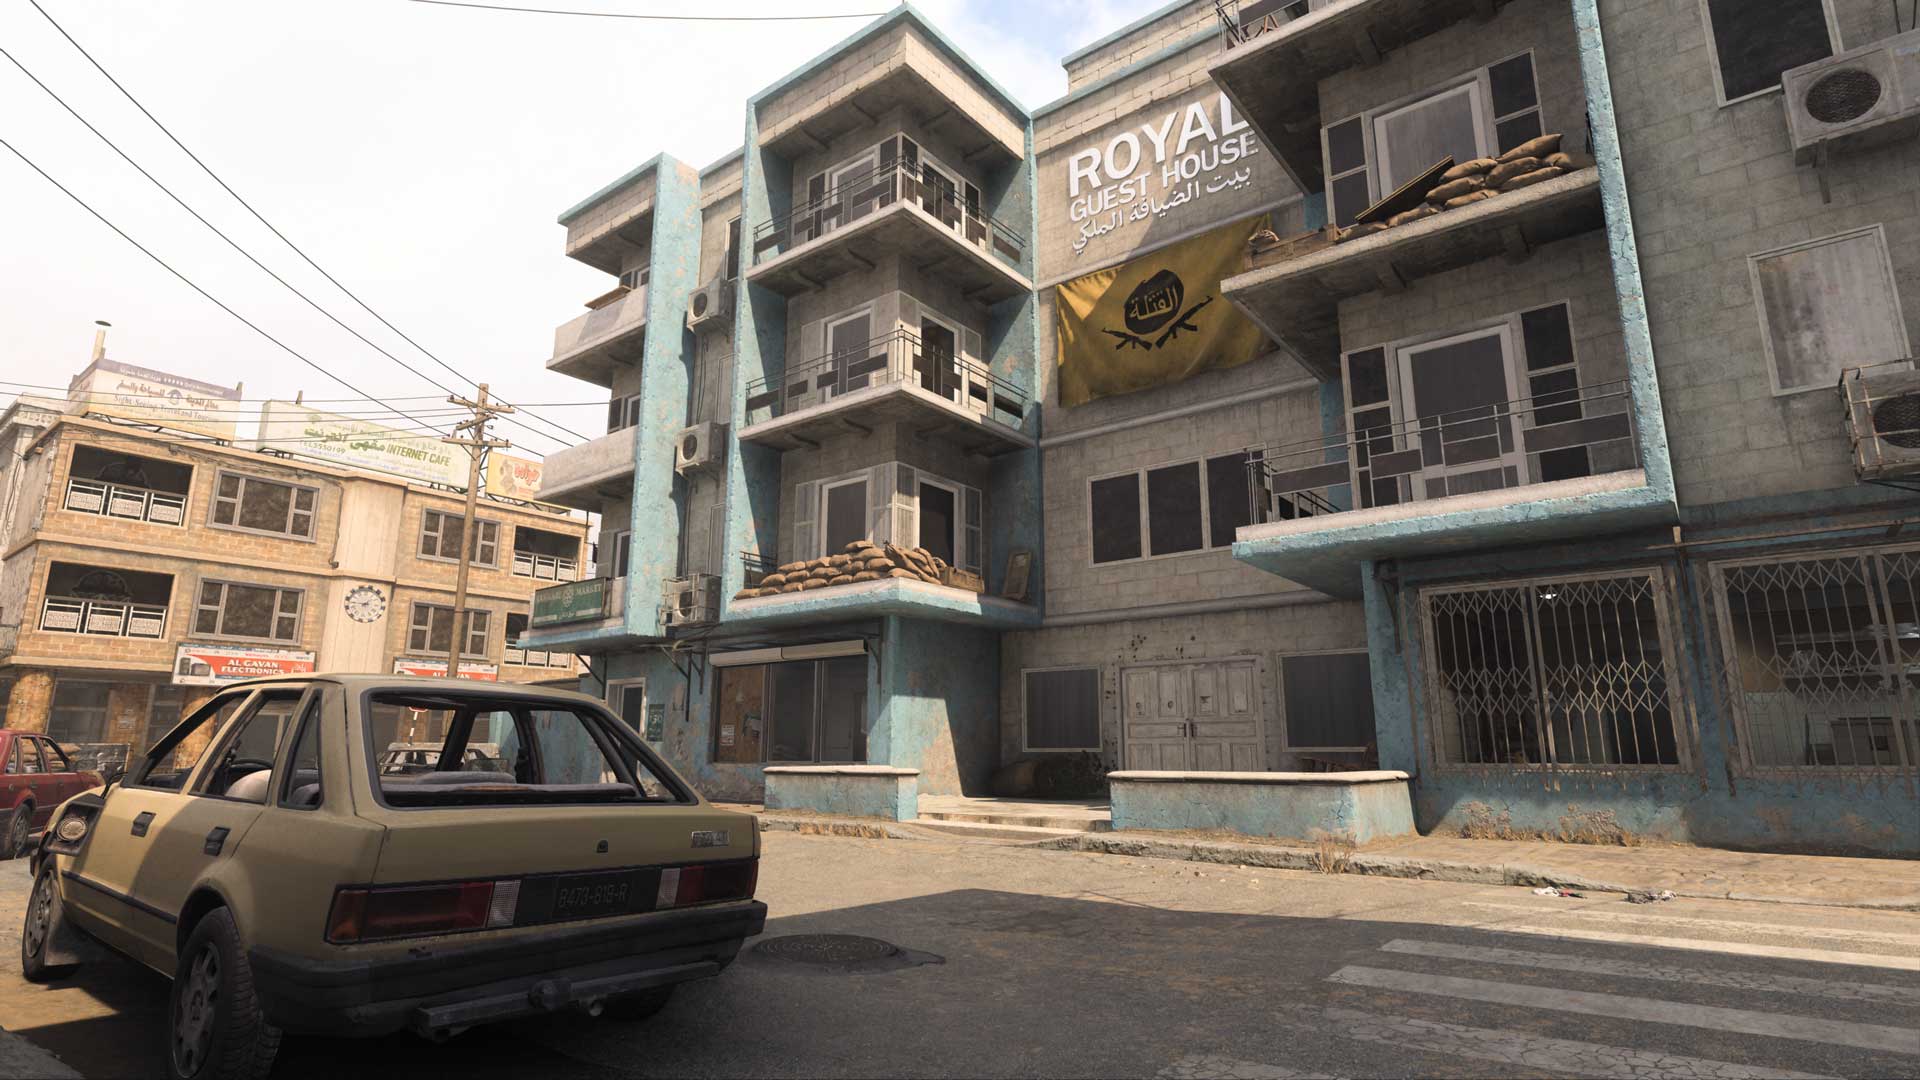
Starting in the northeast and running south through the Market, this section offers a great means of moving up and down the map without being exposed to the central Main Street. Its narrow layout and plentiful cover pieces allow close- and midranged Loadouts to shine in a map where long distances are the mainstay.
There’s also easy access to the Apartment and Electronics Store for making a push west, both offering valuable cover when combat gets heated.
Apartment
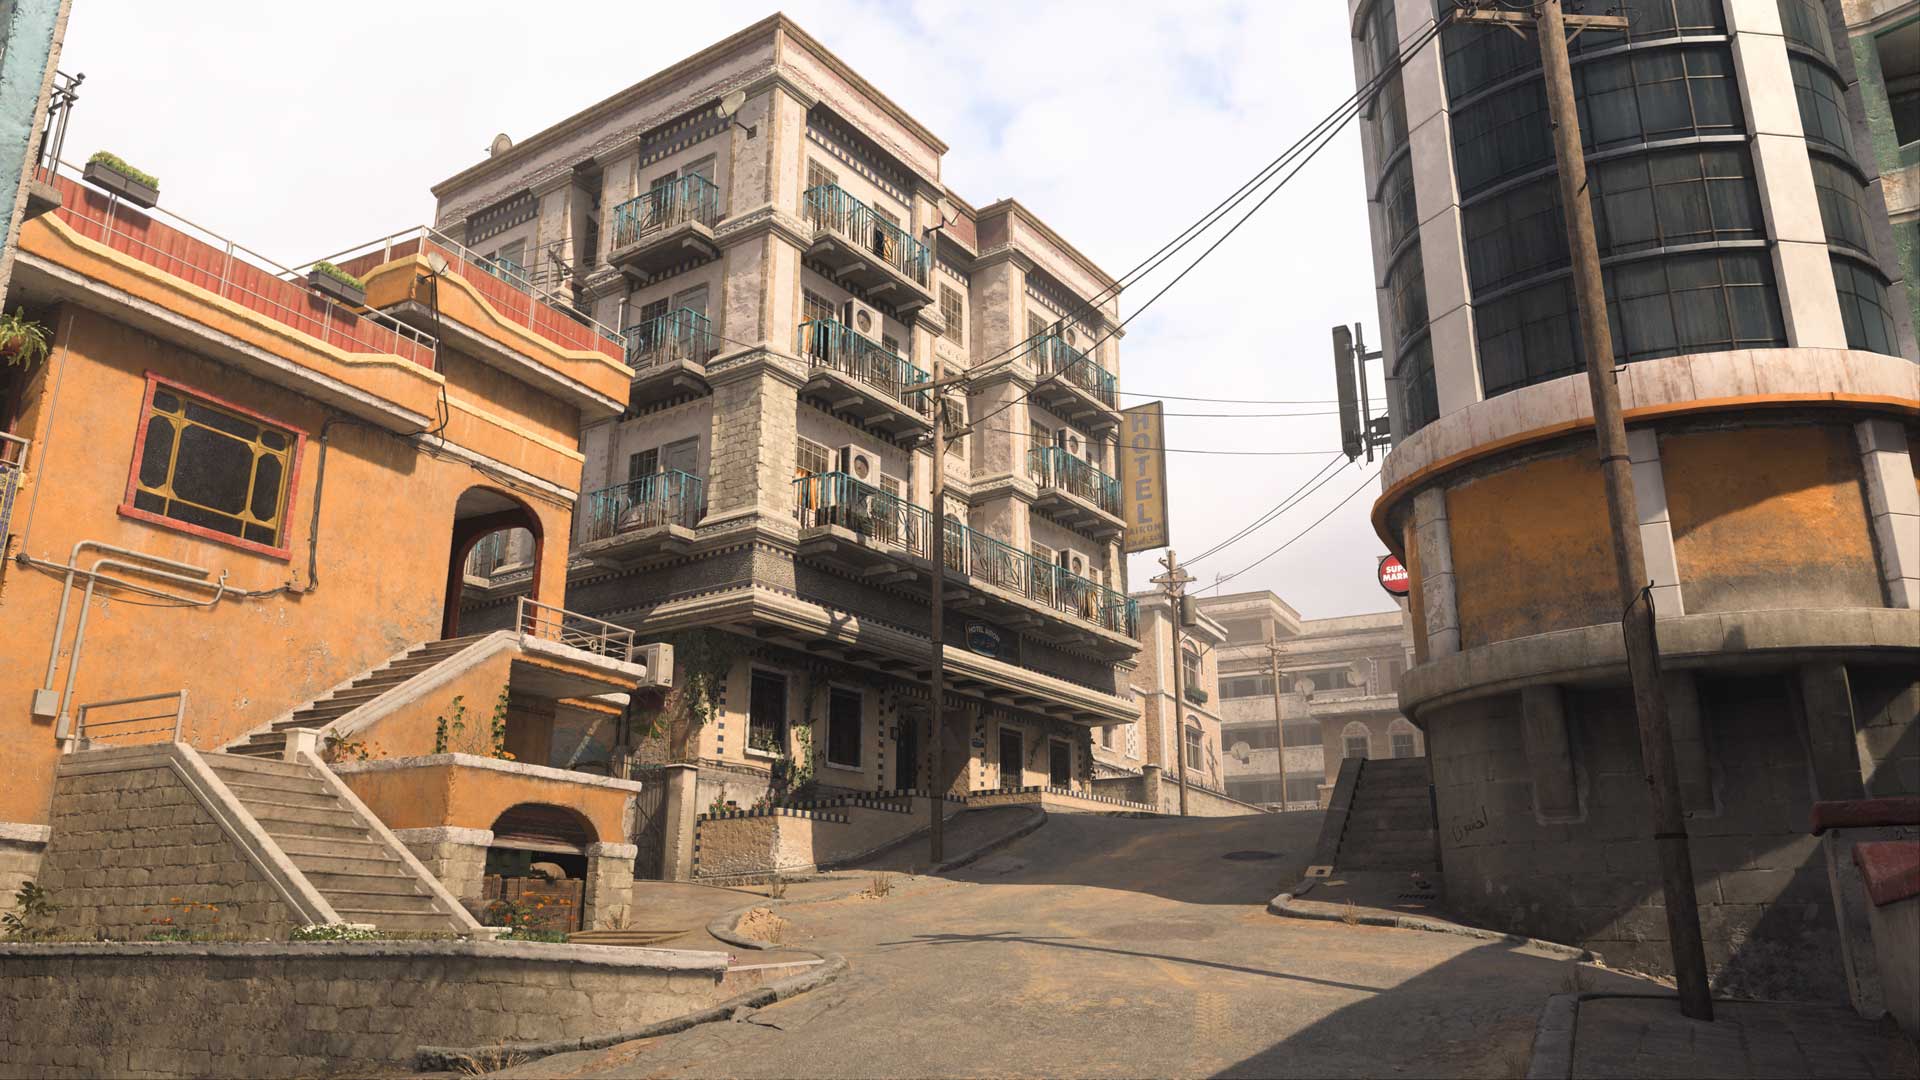
Easy to spot by the big “Laundry” sign hanging out front, the Apartment marks a critical point in the northeast section of the map, standing guard over the Junkyard, Market, Crashed Car, and the roads leading toward the Clock Tower and Main Street. Its two levels offer multiple points from which to launch an attack, so an active player can attack on all sides.

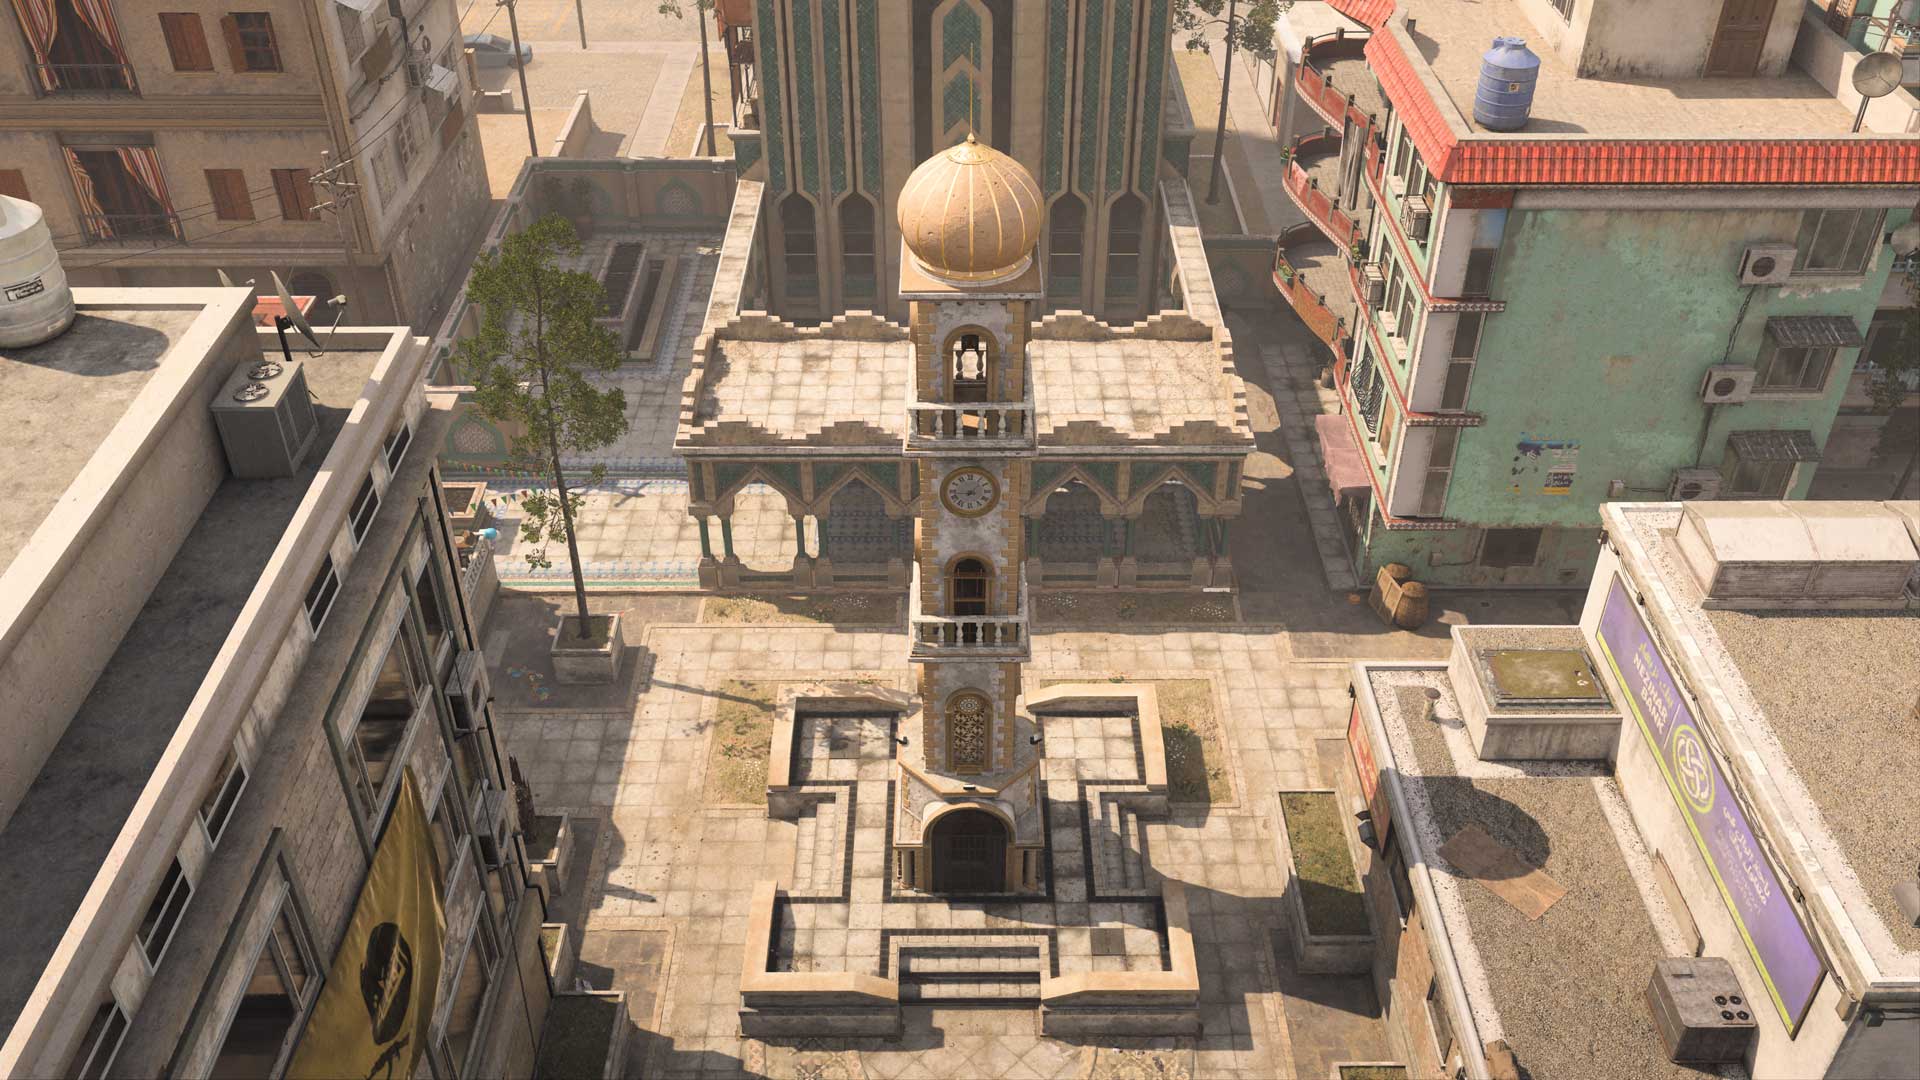
Clock Tower
Surrounded by high walls, the Clock Tower and Culture Center behind it mark another point where shorter-ranged Loadouts can perform well. The entry points from the Café to the west, Main Street to the south, and Apartment to the east present some risk when holding these positions, but the area’s central location gives Operators a chance to cut off a major thoroughfare through the map. Lock down this spot and enemies will be forced into crossing Main Street.
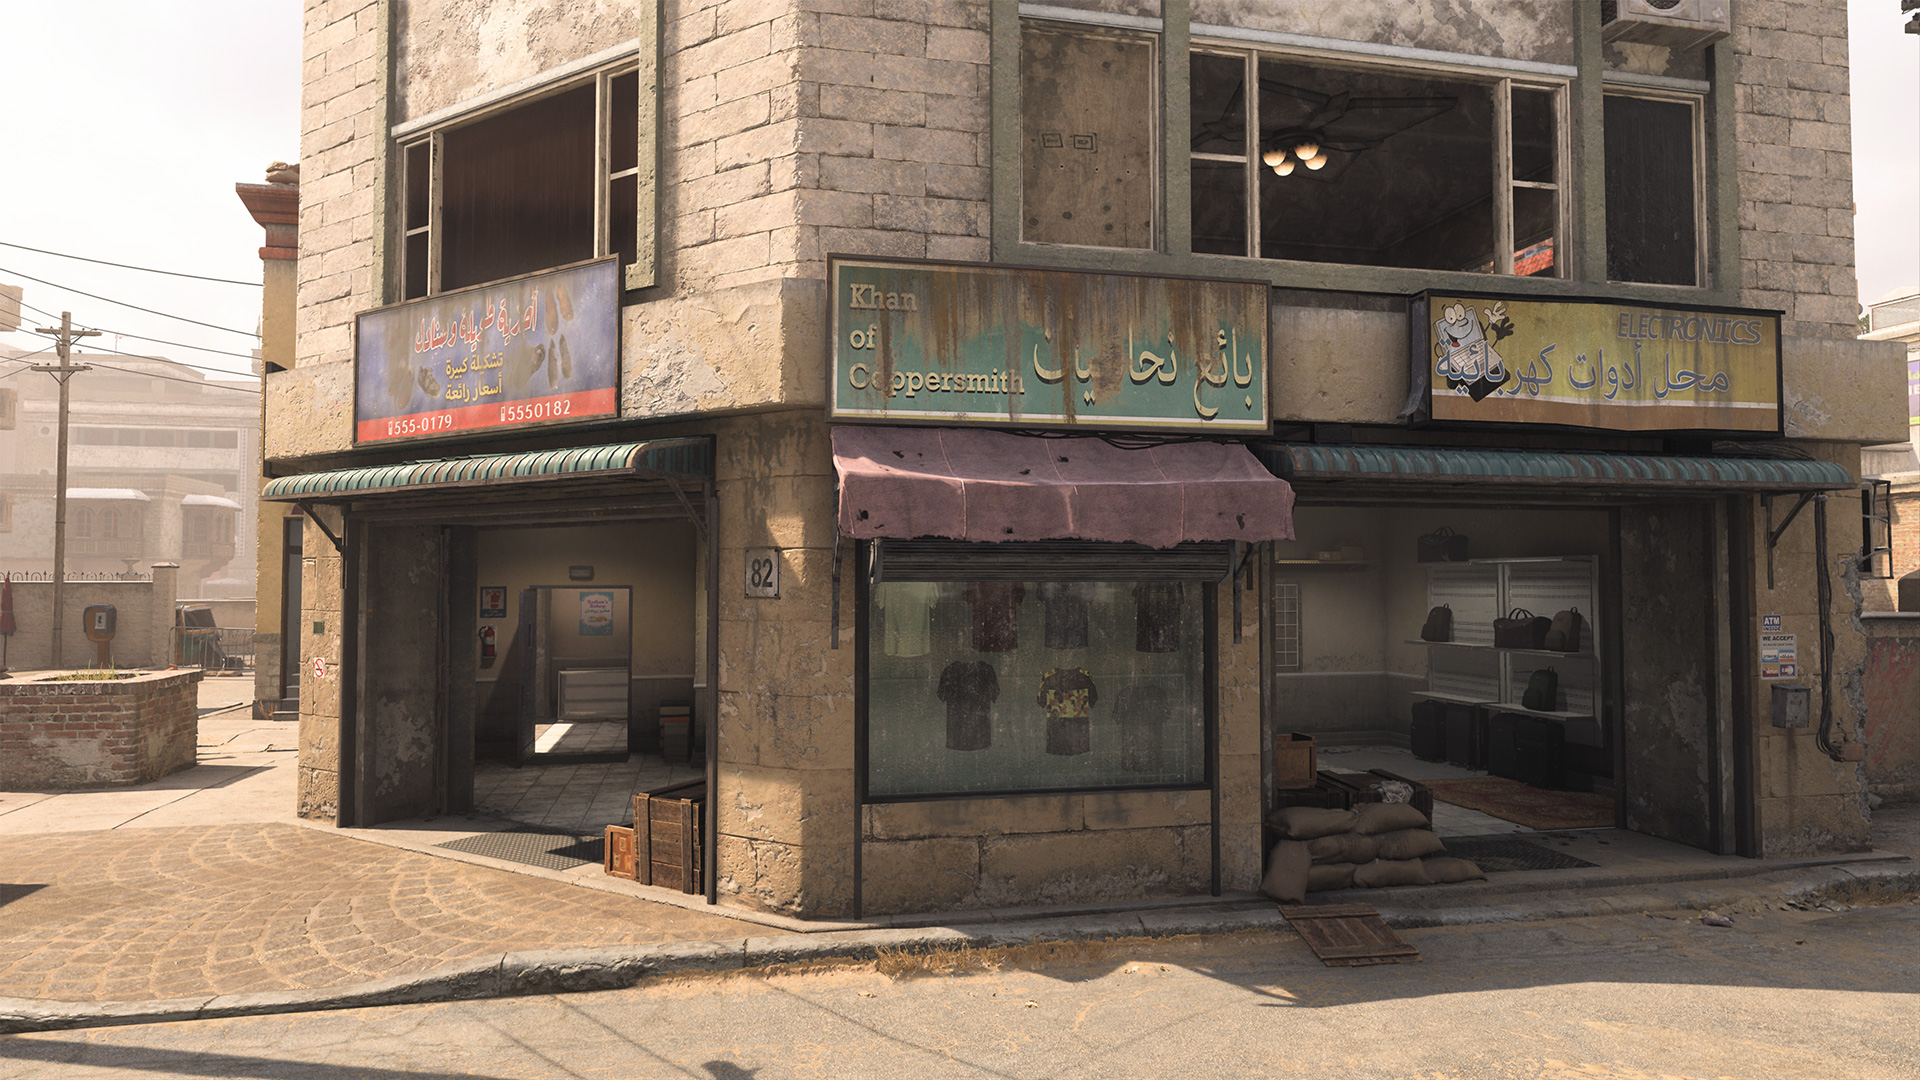
Shops
The Shops form a key area around the western section of Main Street, providing access to several interior spaces. The Café and Main Store are great starting points for an attack toward the Clock Tower, with the upper Main Store additionally looking deep into Hill. The Restaurant on the area’s southern border offers a large ground-floor interior; hop onto the walls surrounding its outdoor seating for a raised view over the Shops.

Main Street
A sniper’s paradise, Main Street stretches nearly all the way across the map. Located in the center, it’s also a major crossing point. If you need to get through, take a moment to read the area and then race across using Tactical Sprint.
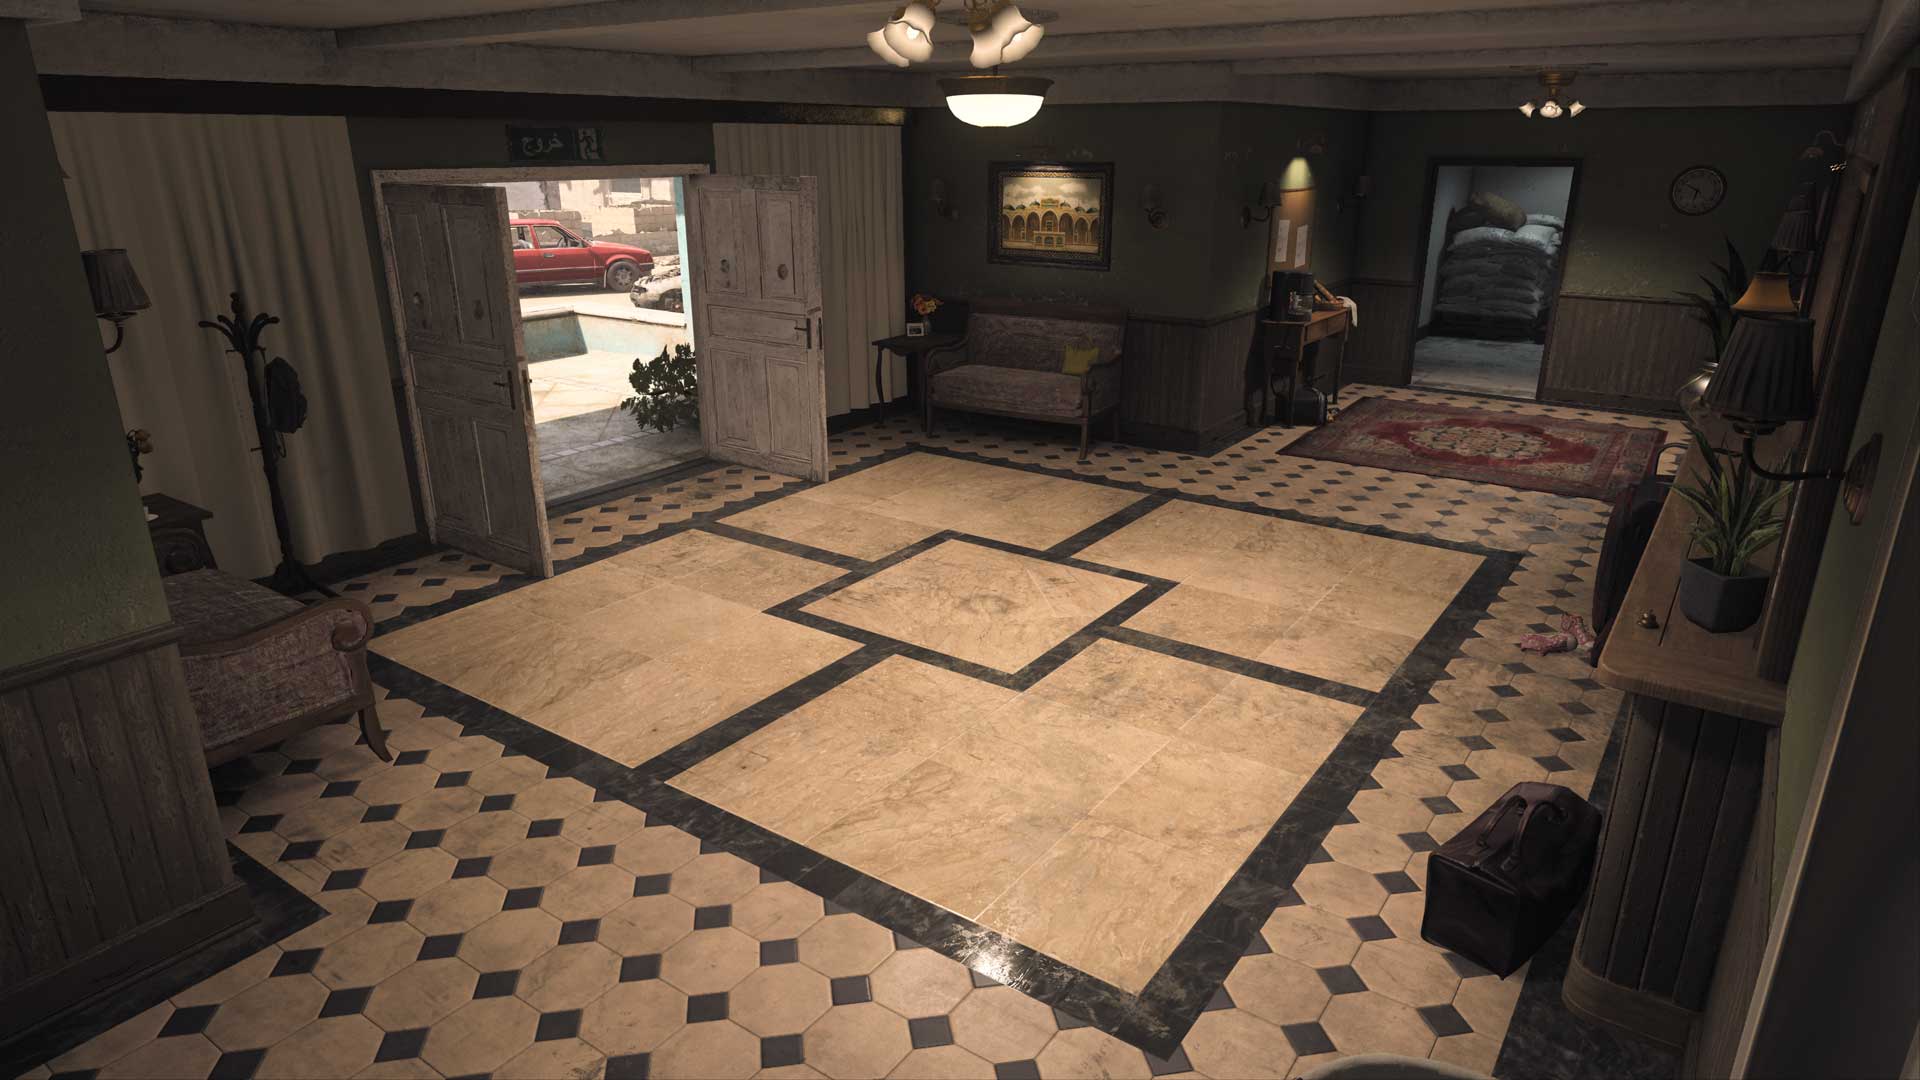
Expect Operators to occupy the buildings on its perimeter, namely the Main Store on its west end, the Electronics Store on its east end, and the Hotel along the bottom. Expect fighting from building to building, with Operators in the street getting caught in the middle. Sandbags, barricades, and other obstacles offer some cover in the street, but you’ll still be highly exposed from multiple angles.
Hill
While not quite as concealed as the Junkyard main spawn, the Hill sits relatively apart from the rest of the map, at least when pulling back behind Thorley’s Supermarket. Note that, for this version of Strike, a new hallway was added for better combat flow, ensuring that an Operator that holes up in the Supermarket can still be smoked out through this hallway.
When looking north, long-ranged Loadouts can get some shots on enemies in the Main Store and even out to the Shops.
Note the balcony of the orange building here — this provides a good vantage point against enemies moving between Hill and the Flower Shop just east. And watch for Shotguns when traversing the tight staircase connecting Hill and Restaurant.
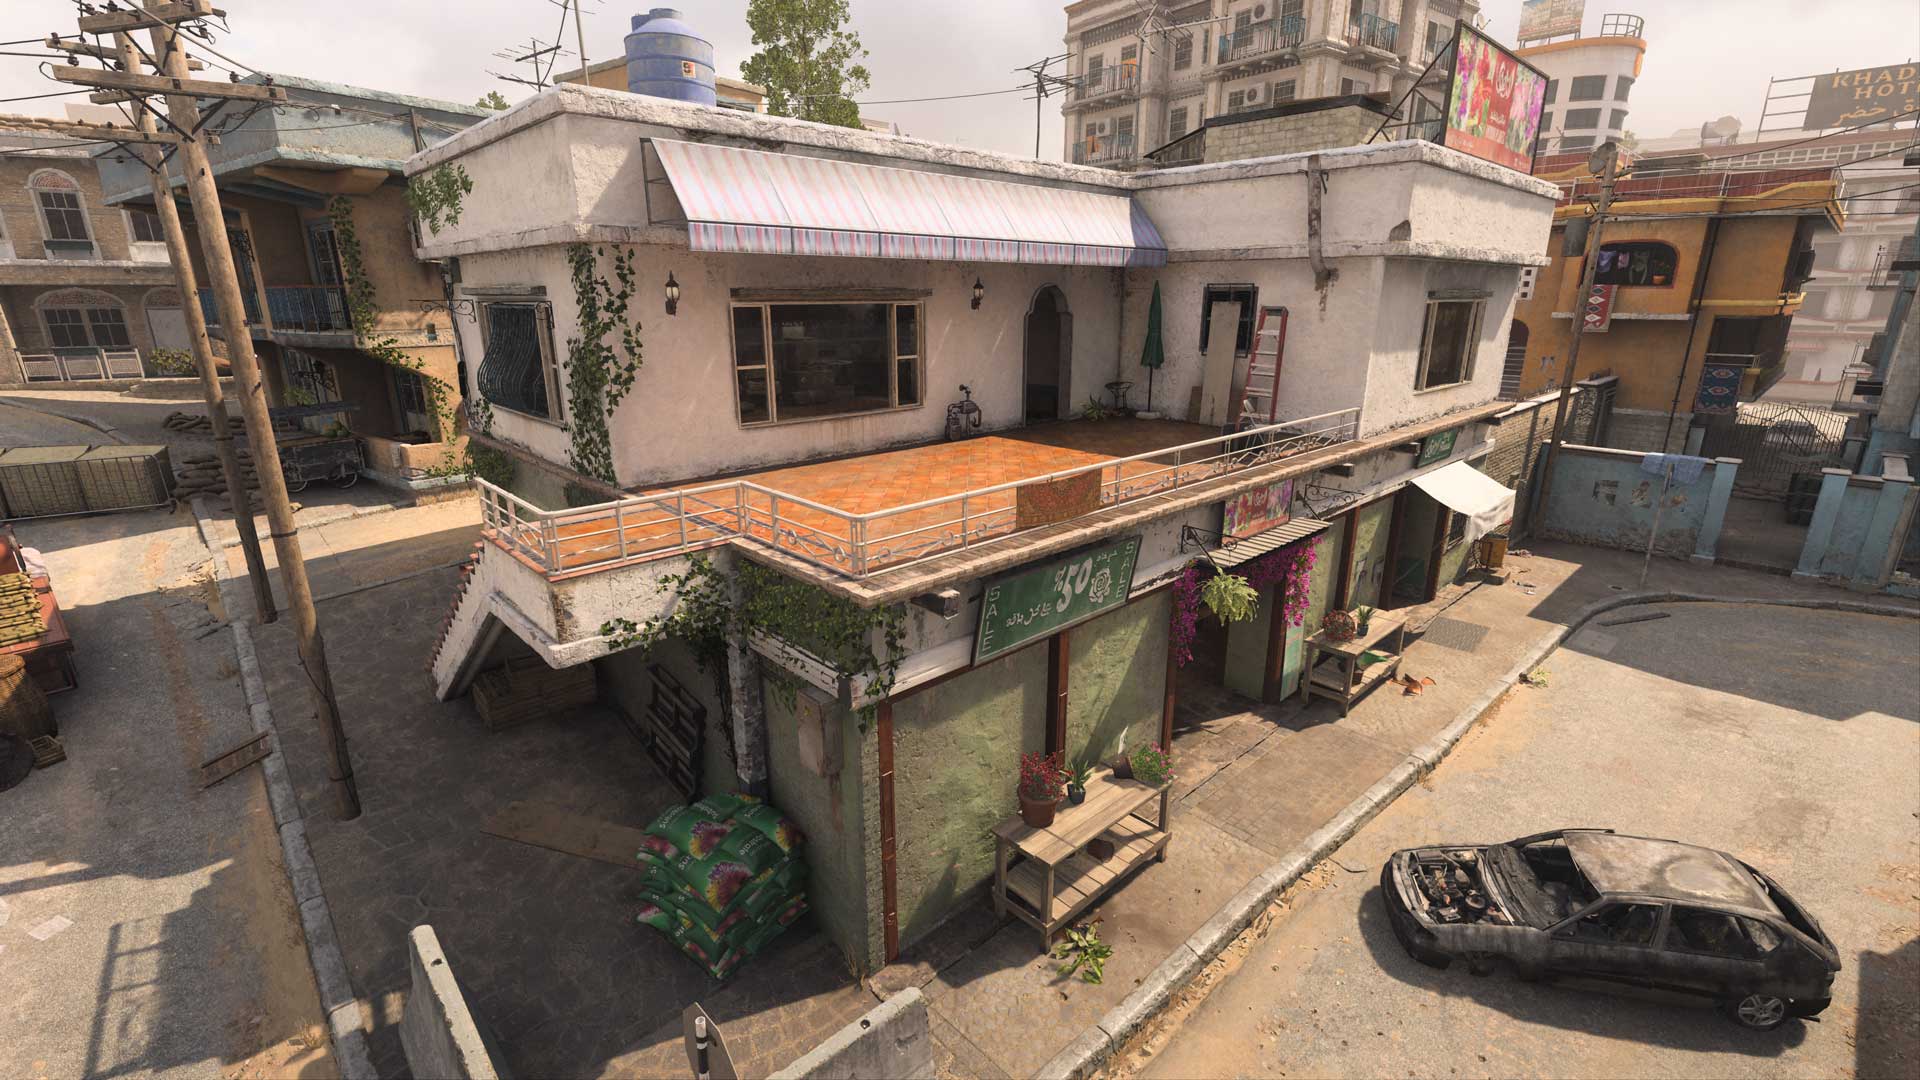
Flower Shop
The Flower Shop provides a strong power position over activity in the southeast, with its upper level offering views toward Hill, over the Market, and a small section of the eastern Main Street. From the ground floor, its single front entrance provides a more concealed view against enemies coming in from the north. The gas station just east is also worth mentioning; while you can’t get inside of it, the low stone wall and barricade offer solid protection when skirmishing in the area.
Objective Routes and Rotations
Mode Intel: Domination
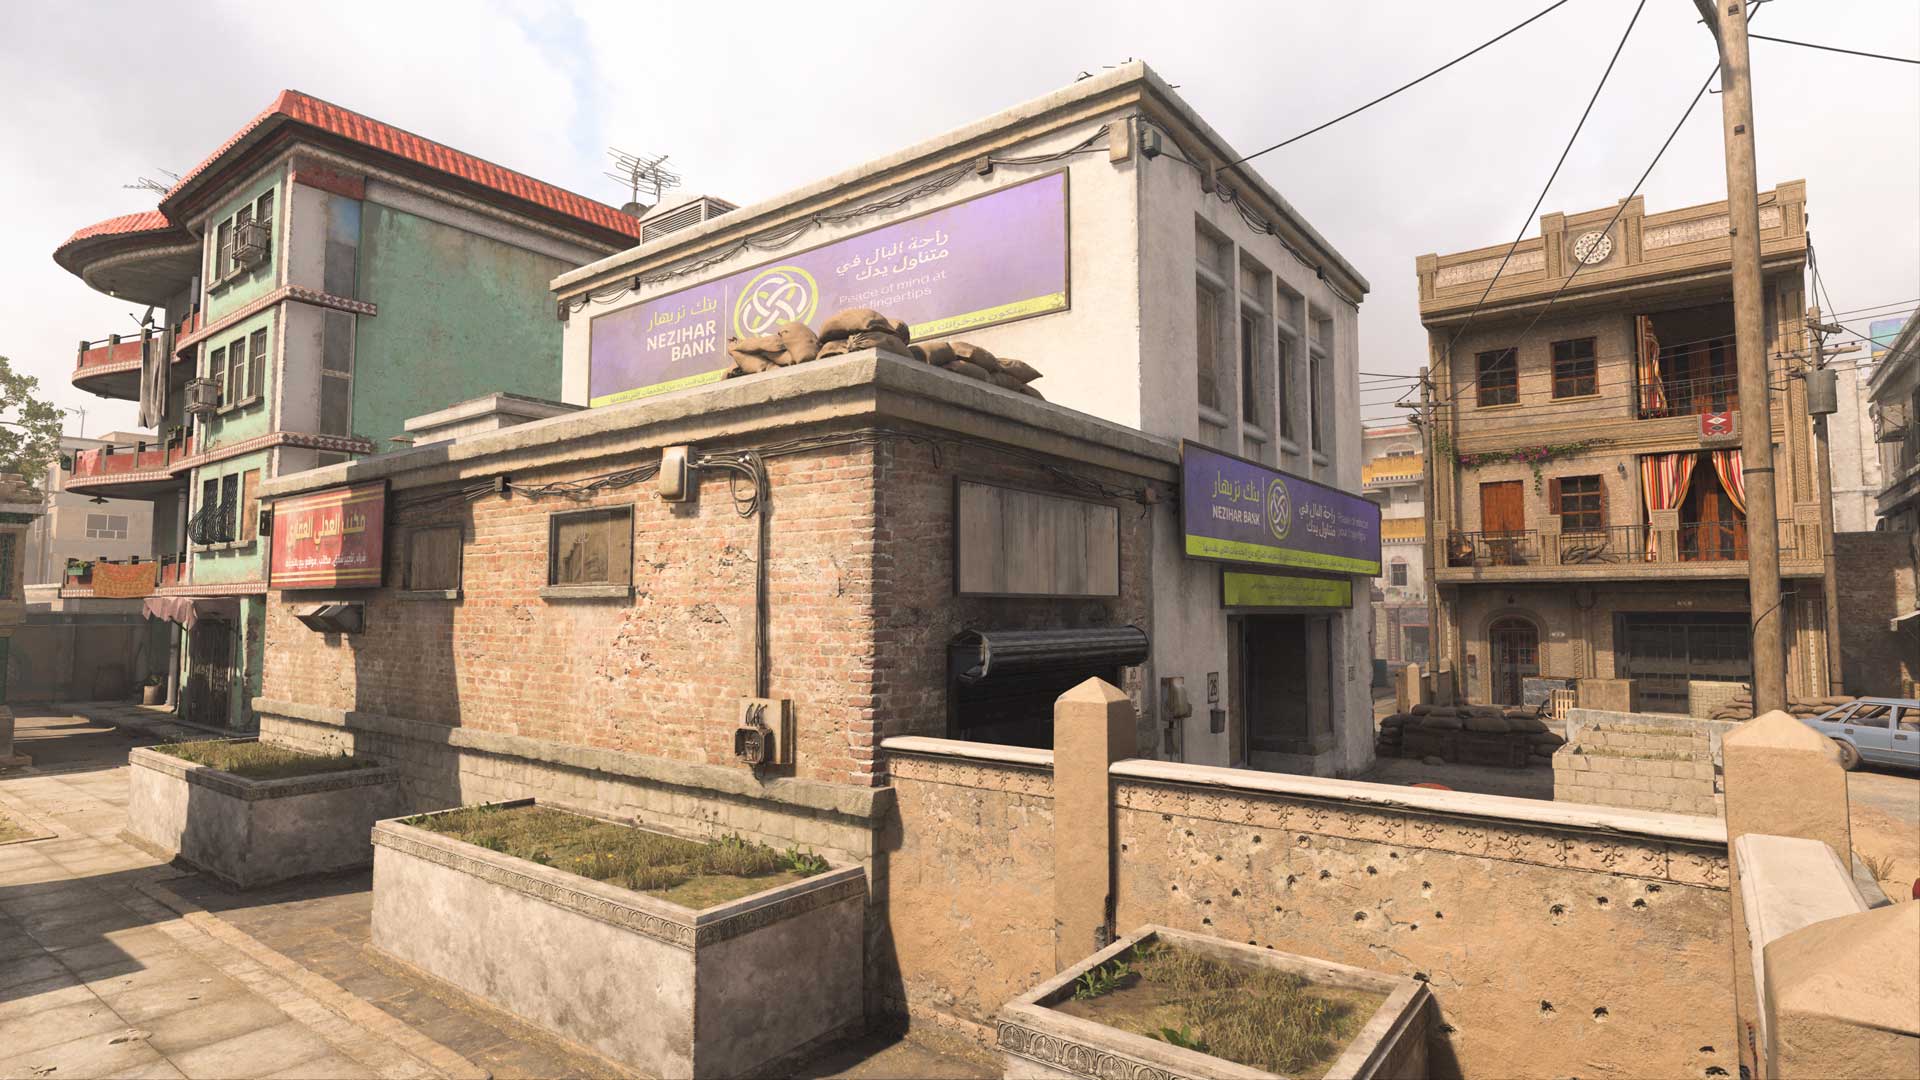
Main Street heats up even more in Domination, with all three flags positioned just out of sight of the main drag. In the west, the A flag sits within the Restaurant’s outdoor seating area, surrounded by high walls. It’s a short trek from here to the B flag at the base of the Clock Tower, but the deadly Main Street separates the two.
Positioned in the eastern Market, the C flag presents a longer travel time to B, but it’s possible to move between the two flags without crossing Main Street. The team that can hold down the Clock Tower is in the best position to win, even if that means swapping between A and C as your second flag; because the area is relatively protected, it’s not as difficult a task as capturing B in other maps.
Mode Intel: Search & Destroy
It’s a long route to the bomb sites on this large map, with the attacking team starting in the southern Hill, the A site positioned by the Cultural Center behind the Clock Tower, and the B site in the eastern Market just behind the Apartment. The defending team therefore has ample time to get into position, so take it slow and communicate. Thankfully, because both sites are north of Main Street, attackers can avoid the danger there by quickly crossing over at the start of the match. Moving east from Shops is also a solid strategy, as well as booking it to the Flower Shop and then working your way up to the B site.
On defense, the Apartment offers an obvious power position over B, so it may be wise to send the bulk of your forces to the A site until you have a better idea of where the attackers are heading. And don’t hesitate to fan out, as this provides the team a greater overall field of view.
Mode Intel: Hardpoint
There are six total Hardpoints on Strike, making this a great mode for learning all the ins and outs of the map. Teams will first rush to the center with the initial Hardpoint appearing inside the Hotel before moving just west outside the Restaurant; bulk up your forces between these two areas to increase your chances of getting the most points out of both objectives.
From the Restaurant, the objective moves to the Electronics Store on the other side of Main Street, then south to the Flower Shop. As with the first two Hardpoints, sending the bulk of your forces between the third and fourth objectives can help you form an early lead in the match. From the Flower Shop, teams will need to cross the map for the fifth Hardpoint by the Cultural Center; get some Operators there early since it’s a long trip. The final Hardpoint appears in the primary room of the upstairs Apartment. On a larger map like this, early rotations are crucial, so play aggressively.
Top Tips
1. Learn the layout. With large buildings around every corner, you might at first feel like you can’t move a step without being spotted from some balcony. That’s not the case, however, as many of the buildings are closed off or only accessible on the ground floor. Take your time learning where the real threats are so you can ignore the rest.
2. Know your power positions. Once you’ve identified the traversable buildings, it’s time to lock in on the major power positions so that you know where to look when passing through. Get to know the Flower Shop, Apartment, and Main Store, and don’t neglect power positions located on the ground floor in places like the Hotel and Electronics Store.
3. Up in smoke. Enemy snipers clogging up Main Street? Equip a Smoke Grenade so you can obstruct their view when you need to pass. Pair it with the Drill Charge to blast enemies inside buildings and behind the walls by the Clock Tower and Restaurant.
4. Found you. On larger maps like Strike, it can be more difficult to pinpoint the enemy’s location. Use the Spotter Bonus Perk to check for fortified positions around the map, particularly within and around the main traversable buildings.
5. Special delivery. Can’t seem to dislodge the enemy Operator holed up in the Apartment or get close to that deadly sniper on Main Street? Use the Bomb Drone Killstreak to send them an explosive gift. It’s cheap and it gets the job done.
6. Pick up weapons. On bigger maps, there’s often a greater chance of running through your ammo reserves. Expand your supply by picking up weapons on the ground as you move through the map.
7. Easy Care Packages. Fall back to the Junkyard or Hill for an easy Care Package deployment. While the enemy is fighting for control over Main Street, you’ll be safely acquiring your next streak.
8. Birdseye. Use the Birdseye Ultimate Perk for a better view of the minimap, making it more difficult for enemies to catch you unaware on a flank. Pair it with the UAV and/or Portable Radar Field Upgrade to reveal the enemy’s direction on each ping.
9. Tactical Insertion. Take control of your next spawn by placing a Tactical Insertion, an especially useful item when you need to hold down a specific area of the map.
10. Buddy system. Traverse the map with a friend to better your odds against enemy encounters. The loser of each skirmish has quite a trek back to their position.
Stay frosty.
© 2023 Activision Publishing, Inc. ACTIVISION, CALL OF DUTY, and MODERN WARFARE are trademarks of Activision Publishing, Inc. All other trademarks and trade names are the property of their respective owners.
For more information, please visit www.callofduty.comand www.youtube.com/callofduty, and follow @Activision and @CallofDuty on Twitter, Instagram, and Facebook.
Related Articles
July 31, 2023
Call of Duty: Modern Warfare II Punta Mar Map Intel
The Mission: Detailing the map, tactics, and tips for a 6v6 Multiplayer map set in an idyllic seaside getaway.
July 27, 2023
Modern Warfare II and Warzone Season 05: Content Drop
From a fresh twist of the knife in the Call of Duty: Modern Warfare story, to impressive free content drops across both Modern Warfare II and Call of Duty: Warzone, to celebrating the 50th anniversary of hip hop, get ready for Season 05.
July 10, 2023
Call of Duty: Modern Warfare II Vondel Waterfront Map Intel
The Mission: Detailing the map, tactics, and tips for a 6v6 Multiplayer map inspired by the Floating District of southwestern Vondel.
Back to Top Pre-order Vault Edition Previous Post| COD Blog
View All Call of Duty Posts
| COD Blog
View All Call of Duty Posts
Next Post
We're Hiring
Check Out Job Opportunities At Our Studios
Join Us
Our Teams
- Game Design
- Art & Animation
- Brand Management
- Production
- Quality Assurance
- Customer Support
- Studio Operations
- Programming
- Finance & Accounting
- Human Resources
4月21日今天92/95号汽油最新价格表 4月30日油价调整最新消息
廖鼎昌:展望泉州菜未来 传统之上谈创新
商业场所的清洁利器转大理石纹两连体垃圾桶
吃年夜饭的作文900字(7篇万能范文)
Drop Into the Game: Netflix Squid Game Comes to Call of Duty
2022年全国马术场地障碍锦标赛5月在上海举办